Review and Practice Activities:
We will go through 22 introductory drawing activities before the 'reigns of drawing' are turned over to you to work independently on projects!
Follow directions carefully given to you by the teacher and throughout each drawing tutorial.
Keep ALL drawings and practice work in your sketchbook!
Take your learning seriously and try hard and you will improve your drawing and shading skills!
|
Skills Check:
Art drawing pre-test to determine baseline skill level of each student. |
|
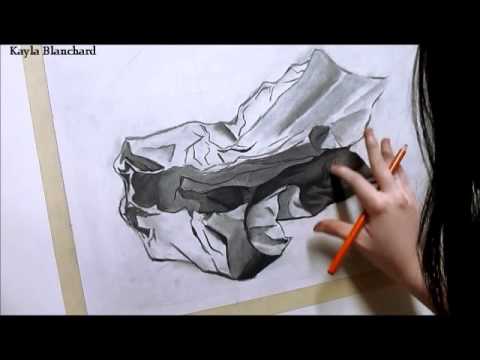
Assessment Activity:
Get a piece of paper and a pencil. You will be given 20 minutes to draw a piece of paper. Draw and shade the piece of crumpled paper taped to the middle of your table to the BEST of your ability. Do not rush to finish early, you are expected to use the entire 20 minutes. If you find yourself with extra time then re-check angles, shading quality, contrast (light vs. dark areas) proportions, add a detailed background, etc... |
|
Basic Skills Activity 1:
Pencils: MUST KNOW Pencils used for drawing come in various lightness or darkness of lead. A typical #2 pencil is about equal to a HB drawing pencil. A 2H pencil is very light and often used in drafting or sketching. A 6B pencil is often used to shade shadows. |

|
Drawing Activity:
Get a piece of paper and 3 pencils: One H-range pencil. One #2 or HB pencil. One 4B or 6B pencil. Shade a small spot on the paper with each pencil. How are they different and what could they be used for in a drawing? |
|
Basic Skills Activity 2
Basic Lines, Shapes, Outlines, and Shading |
|
Drawing Activity:
DO NOW: Gather a piece of paper and a shading pencil in the B-range. |
|
Basic Skills Activity 3
Basic Lines, Shapes, Outlines, and Shading |
|
Drawing Activity:
DO NOW: Gather a piece of paper and a shading pencil in the B-range. |
|
Basic Skills Activity 4
Basic Landscape Techniques |
|
Drawing Activity:
DO NOW: Gather a piece of paper and 3 shading pencils, 1 in the H-range and 2 in the B-range. (HB and a 6B) |
|
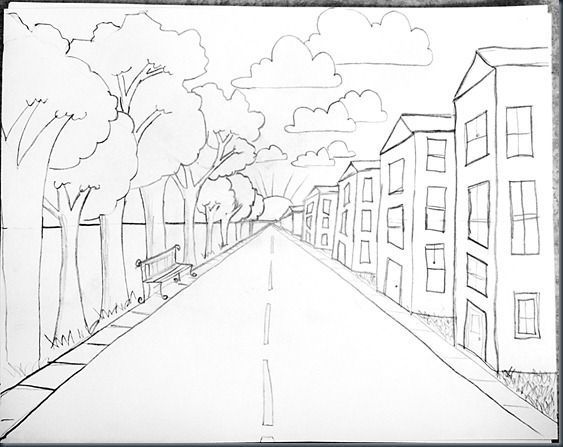
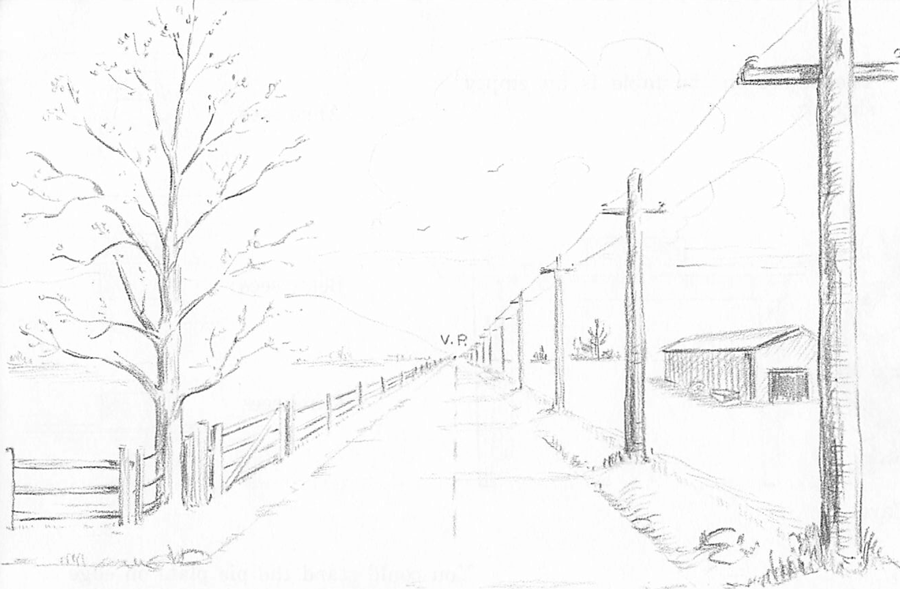
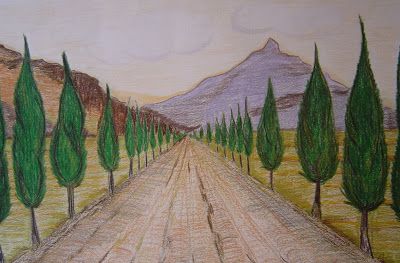
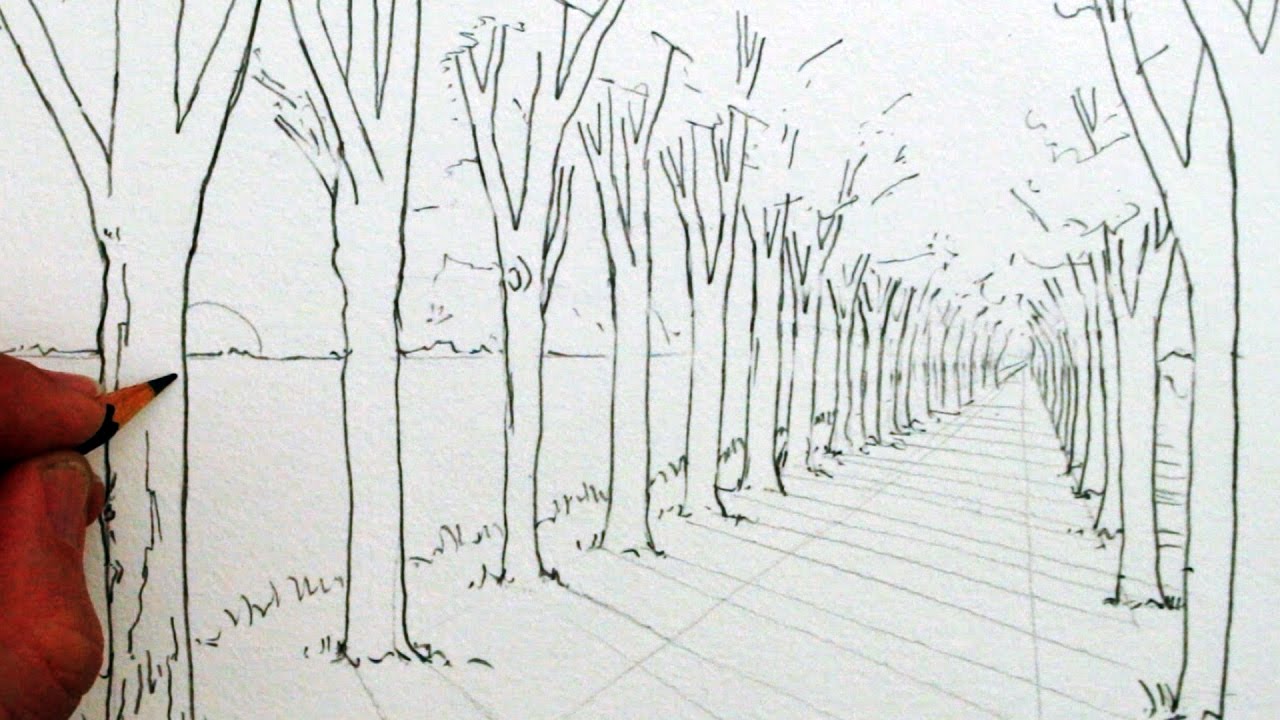
Basic Skills Activity 5
Drawing a Background Using a Vanishing Point One-Point Perspective NEARLY EVERY ONE OF YOUR PROJECTS -or- DRAWINGS ARE REQUIRED TO HAVE A DYNAMIC (INTERESTING) BACKGROUND! |
|
Drawing Activity:
DO NOW: Gather a piece of paper and 3 shading pencils, 1 in the H-range and 2 in the B-range. (HB and a 6B) Practice: Making a pathway in one-point perspective. You choose the objects...concrete, trees, railroad, city, countryside, etc. This will be a simple, non-detailed 15 minute practice drawing. Try out oil pastels to add color quickly. |


|
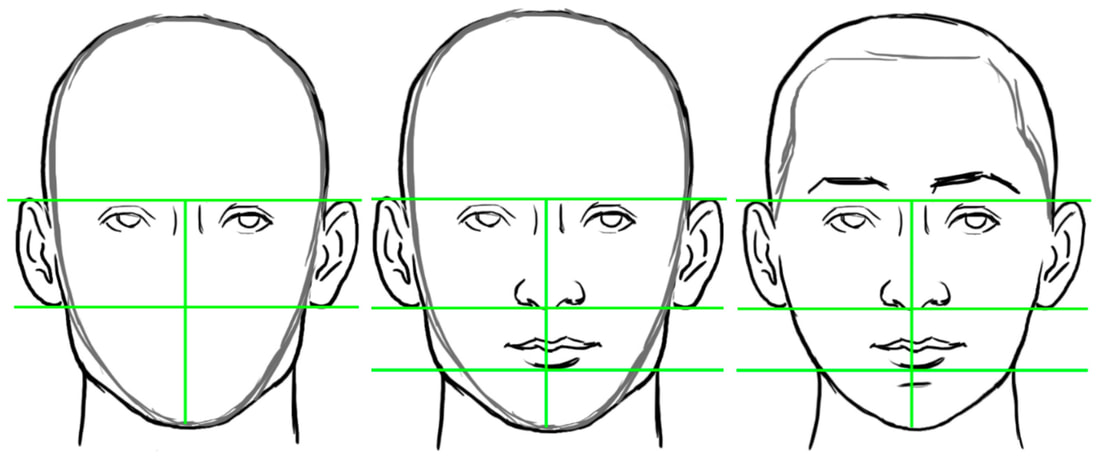
Basic Skills Activity 6:
Proportions of the Human Head In many ways we can divide the human head, when we draw it, up into a vertical half and a horizontal half. The are general proportions. -Top of Eyes Line Up with Top of Ears -Top of Eyes to Bottom of Chin >> 1/2 way is the bottom of the Nose (Bottom of the Nose also Lines Up with the Bottom Ears) -Bottom of Nose to Bottom of Chin >> 1/2 way is Bottom of Bottom Lip |
|
Drawing Activity:
DO NOW: Gather a piece of paper and shading pencils. Practice: Making a human head using the step by step plan below that shows you understand that the human face can be drawn using basic rules of human biology and human proportions. |

|
Basic Skills Activity 7:
Proportions Using the Sighting Method (bottle drawing still life activity to follow) DO NOW: Watch the video clip then get a piece of paper and any pencil. You will be measuring and drawing a bottle placed at the front of the room in a still life scene. You will need to demonstrate you understand how to use the sighting method to proportion a drawing. (10 minutes of drawing time) |
|
Basic Skills Activity 8:
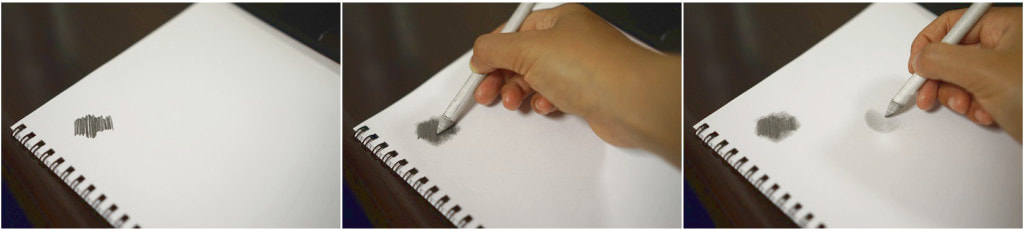
Refresher on How to Hold a Pencil
Do Now: Get a piece of paper, a blending stump, and a shading pencil.
Remember, DO NOT hold a pencil like a writing tool the whole time you are creating art, hold it like a drawing tool, from the side, use the point of the pencil only for dark shading along fine edges. Review the image below.

|
Basic Skills Activity 9:
Rendering or Shading a Tonal Scale |

The above example is unacceptable for a high school quality level of shading, there should be no sections, shading was done very quickly, no blending in between areas, DON'T DO THIS!

Strive to mimic the example above, 0% to 50% to 100% shown in one rectangle and smoothly shaded. DO THIS!
|
Drawing Activity:
Get a piece of paper, draw a rectangle about 1 inch high by 6 inches across, and shade/blend a tonal scale from 0% white to 50% gray to 100% black as SMOOTHLY as you can. |
Basic Skills Activity 10:
Drawing & Shading a Sphere
Do Now: Get a piece of paper, a blending stump, and a shading pencil.
Shade both spheres and the cube as you see them with the BEST QUALITY of BLENDED SHADING you can render!
DON'T DO ANY ACTUAL SHADING WITH THE PENCIL, ONLY USE THE BLENDING STUMP!
Don't forget the background too!

|
|
|
Basic Skills Activity 11:
Drawing Follow Along on Cloth Do Now: Get a piece of paper and a shading pencil in the B range. |
|
Drawing Activity:
We will be practicing how to shade fabrics. This technique is really applicable to shading any object with pencil. You will get to practice drawing cloth using apiece of cloth laid out on your table area. Watch the class demonstration closely, then attempt your own drawing, pay close attention to the tonal shifts and shapes of the fabric! |
|
Basic Skills Activity 12:
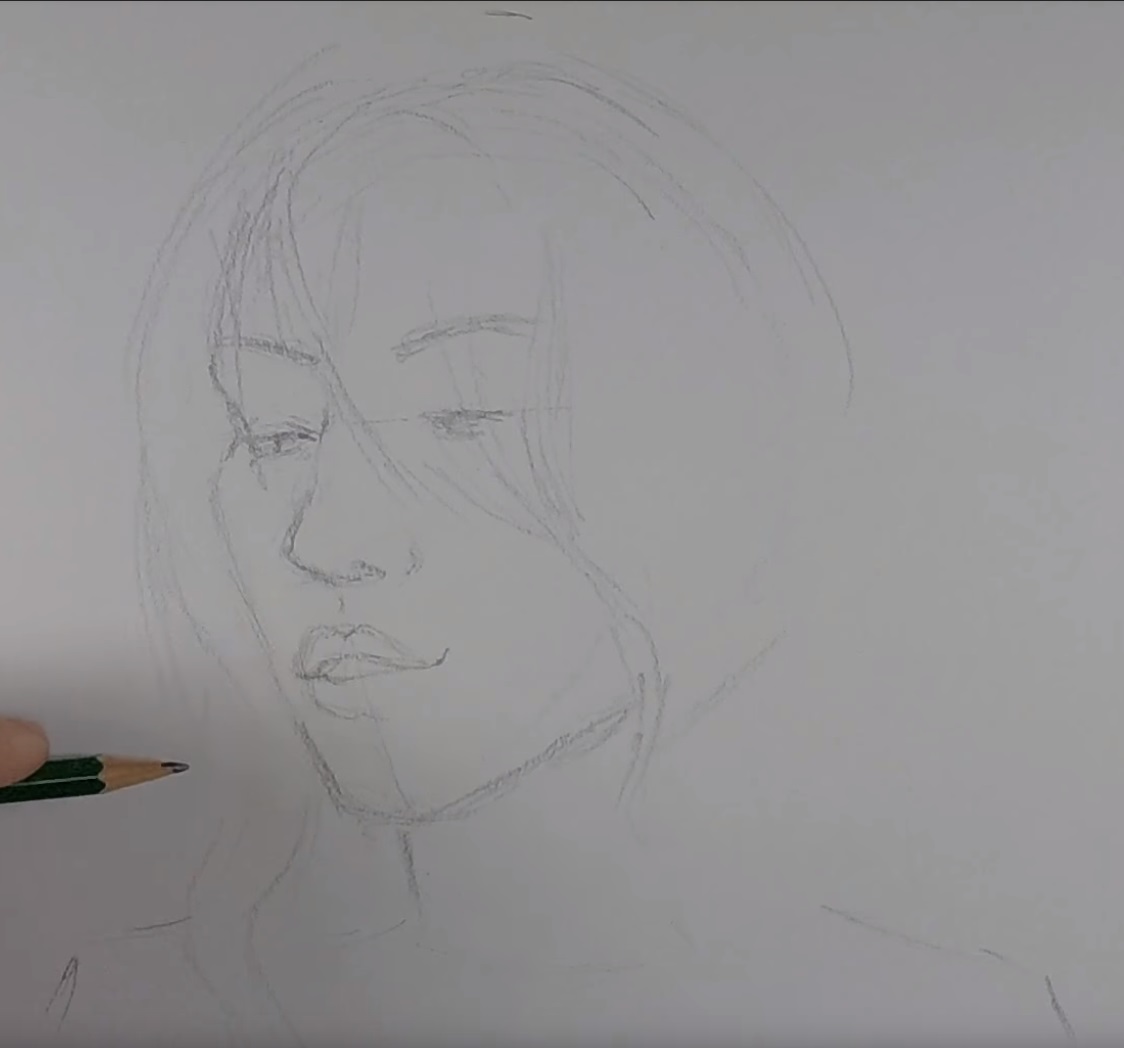
Drawing Follow Along Do Now: Get a portrait shading practice template from the teacher and 3 shading pencils (H, HB, and 4B or 6B). Also get 1 mechanical pencil.
Follow along practice directions below:
|

|
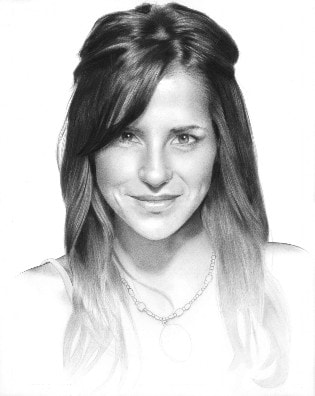
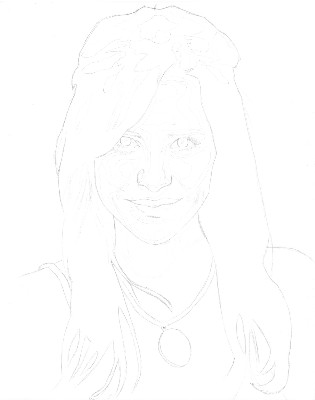
Drawing Activity:
Follow along with these steps below to practice how to shade a face. These steps can be applied to ANY drawing...the key is to look at your original photograph or resource (like a live model) and REALLY pay attention to the level of tone that you see. Try your hardest to match the tone that you actually see with your drawing. | ||
|
Basic Skills Activity 13:
Drawing Portraits Review DO's and DONT's When Drawing Review this video whenever you need a refresher on drawing a portrait. (Covers: eyes, hair, nose, skin tone, ears, lips, neck, and other features) |
|
Discussion Activity:
What did the tutorial presenter do differently to make her work better? List AT LEAST 5 things that they did to improve their work. |
|
Basic Skills Activity 14:
How to Draw Follow Along for the Nose Do Now: Get a piece of drawing paper and a B-range drawing pencil. |
|
Drawing Activity:
Follow along with the tutorial and practice drawing and shading the nose. |
|
Basic Skills Activity 15:
How to Draw Follow Along for the Eyes Do Now: Get a piece of drawing paper and a B-range drawing pencil. |
|
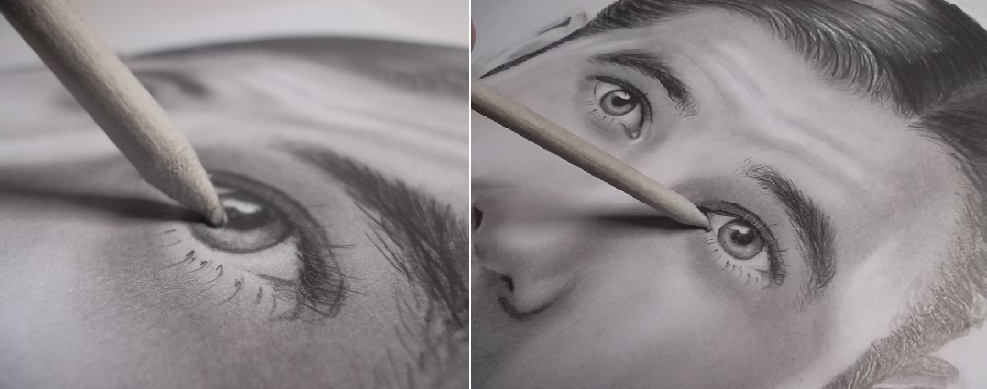
Drawing Activity:
Follow along with the tutorial and practice drawing and shading the eyes. |
|
Basic Skills Activity 16:
How to Draw Follow Along for the Mouth Do Now: Get a piece of drawing paper and a B-range drawing pencil. |
|
Drawing Activity:
Follow along with the tutorial and practice drawing and shading the mouth. |
|
Basic Skills Activity 17:
How to Draw Follow Along for Short Hair Do Now: Get a piece of drawing paper and a #2 pencil and a 4B to 6B pencil..
|
|
Drawing Activity:
Follow along with the tutorial and practice drawing and shading short hair. | ||
|
Basic Skills Activity 18:
How to Draw Follow Along for Long Hair Do Now: Get a piece of drawing paper and a #2 pencil and a 4B to 6B pencil..
|
|
Drawing Activity:
Follow along with the tutorial and practice drawing and shading long hair. | ||
|
Basic Skills Activity 19:
Drawing with Basic Proportions Review How to draw from a grid and photo reference. |
|
Discussion Activity:
What are some of the advantages to using a grid versus the observational method of drawing? Which do you prefer if you have drawn a lot prior to this course? *(Short demo of our grid drawing materials and tools for enlargement to follow) |
|
Basic Skills Post-Assessment
Do Now: gather a piece of drawing paper and 2 or 3 drawing pencils, an eraser, and any other drawing tools you would like to use. Try your best (demonstrate your current ability) in drawing the paper given to you. (20 minute assessment) 
|
Assessment Activity:
Get a piece of paper and a pencil. You will be given 20 minutes to draw a piece of paper. Draw and shade the piece of crumpled paper taped to the middle of your table to the BEST of your ability. Do not rush to finish early, you are expected to use the entire 20 minutes. If you find yourself with extra time then re-check angles, shading quality, contrast (light vs. dark areas) proportions, add a detailed background, etc... After your assessment is complete, on your assessment paper, write down 2 art skills you feel you have become exceptionally better at being able to do versus the first day of class. Assessment Note: Assessment is graded on growth over time and mastery of skills. Students are expected to progress 1 or more levels by the end of the unit. Scores Awarded: Level 1 - Not Proficient Level 2 - Average Level Proficiency Level 3 - Accomplished Level Proficiency Level 4 - Advanced Level Proficiency |
|
Basic Skills Activity 20:
7 Basic Colored Pencil Techniques |
|
Drawing Activity:
Draw 6 squares about 2" x 2" on a piece of drawing paper. Follow along with the tutorial and practice drawing techniques. -Layering -Burnishing -Colorless Blender -Solvent (mineral spirits) -Saturation Burnishing -Tonal Burnishing -Powder Blender |
|
Basic Skills Activity 21:
Basics of Blending & Drawing with Colored Pencils |
|
Drawing Activity:
Follow along with the tutorial and practice drawing techniques. -Smooth Blending: use opposite directions -Glazing -Light Layers (very light layers!) -Use a smooth, non-textured paper |
|
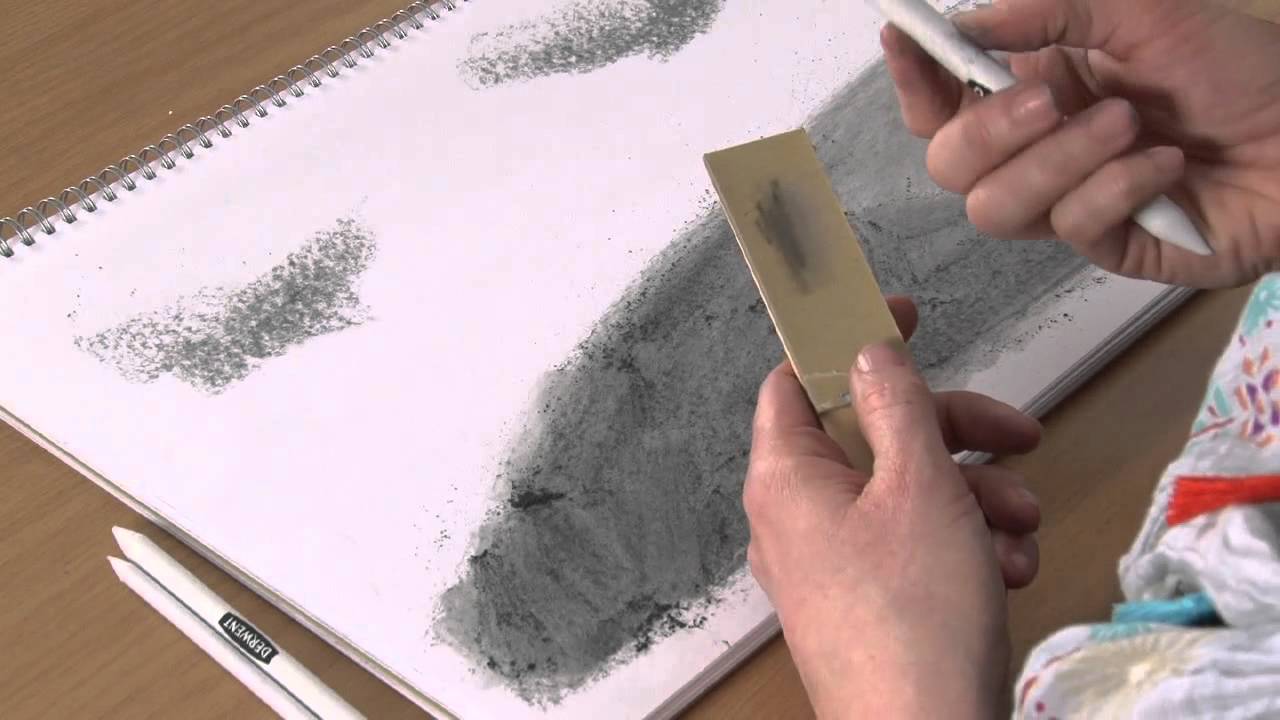
Basic Skills Activity 22:
Basics of Blending & Drawing with Charcoal & Charcoal Powder *(brief review of this tutorial) |
|
Drawing Activity:
Using a piece of drawing paper, draw a cube, choose a light source, and shade the cube using a soft brush and charcoal powder and a charcoal pencil. White charcoal can be used to highlight areas. |
