Day 1 Activities
|
Getting Started with the Art Learning Journal
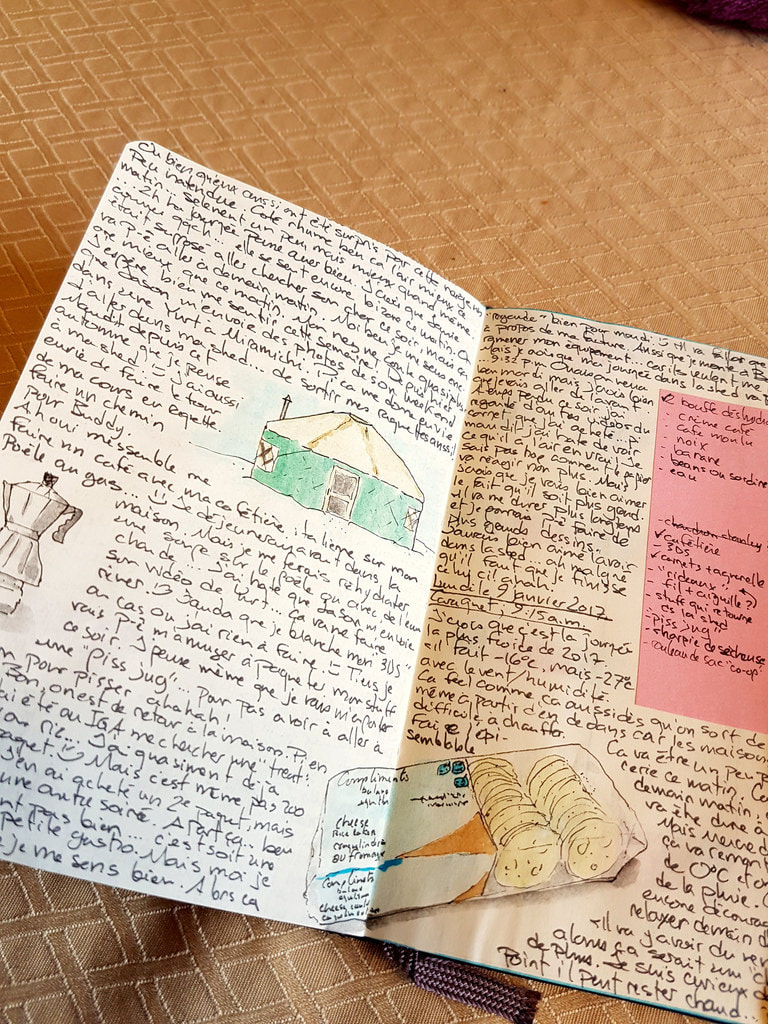
You will be required to keep a art learning journal. This journal will contain space for daily sketches, daily goal setting, daily exit tickets, important directions for major art projects, information on the elements and principles of art, and information about the art themes available to work with during the class. DO NOT LOOSE IT! Please leave them in the room in the journal bin for the class period you are in! |
|
E&P Journal Activity:
MAKE SURE TO WRITE YOUR NAME ON THE FRONT OF THE JOURNAL! We will cover the first few pages of the journal and its contents as a group. Complete the elements and principles of art activity in your journal. Go to Google Classroom and join the Ceramics Class, open the Elements & Principles of Art Assignment. Look for excellent examples of artists working in a clay or ceramic medium whose objects represent each of the elements and principles. Right-click an image you find and then copy and paste each into the Google Doc assignment and size them to about 2x2 inches. Turn in the document when you are finished for printing. Cut out the printed photos and tape them onto the journal page in the appropriate spot. These examples can become great sources of inspiration when you begin to look at how you will apply the elements and principles of art in your own projects. |
|
Room Tour
Do Now: while working on the element and principle activity the teacher will take students on a room tour in groups of 6 to 8 to cover where the Ceramics tools, equipment, and materials are located at. Safety concerns and habits will also be addressed with regard to the kiln and clay tools. |

|
Room Tour Notes:
-Sink, Washing Hands & Clay -Recycling Used Clay -Clay Tools Area -Glazing Area -Examples Area -Artwork Storage Area -Pottery Wheels & Care/Cleaning -Storage Bags -Plastic Bats -Rolling Pins & Clay Towels -Fresh Clay Barrel |
|
Basic Clay Skills Pre-Assessment
Do Now: gather a piece of clay from the clay storage tub and the following tools: -modeling tool -towel -loop tool Your task is to sculpt a head (with or without a neck) that can fit into the palm of your hand or is about the size of a softball. It should be as detailed as possible. (30 minute assessment) Use ALL of your time and be as detailed as possible. |
|
Assessment Activity:
After your assessment is complete wait for the teacher to check your work. Assessment Note: Assessment is focused on growth over time and mastery of skills. Students are expected to progress 1 or more levels from the beginning of the clay course by the end of the clay course. Scores: Level 1 - Not Yet Proficient Level 2 - Average Level Proficiency Level 3 - Accomplished Level Proficiency Level 4 - Advanced Level Proficiency Clean Up: Recycle your clay pre-assessment ONLY after the teacher has marked it. |
Day 2 Activities
|
Principles of Clay
7 Minutes The Six Stages of Clay |
|
Journal Activity:
DO NOW: In your journal (OTHER CLASS ASSIGNMENTS SECTION) write down the following bold terms...they are VERY IMPORTANT to know and understand in the clay class! SLIP - watery clay WET / PLASTIC - very moldable clay LEATHER HARD - tough but still moldable BONE DRY - dry, most H2O evaporated FIRING - heating the clay to harden it more TYPICAL MAX OVEN TEMPERATURE - 550 F BISQUEWARE TEMPERATURE - 2000 F GLAZEWARE TEMPERATURE - 2200 F (high-fire glaze firing is food safe) Projects with air pockets stuck inside or H2O left in them break/explode around 650 to 850 F. After Video: Brief discussion about kiln safety. |
|
Basic Clay Skills Activity 1:
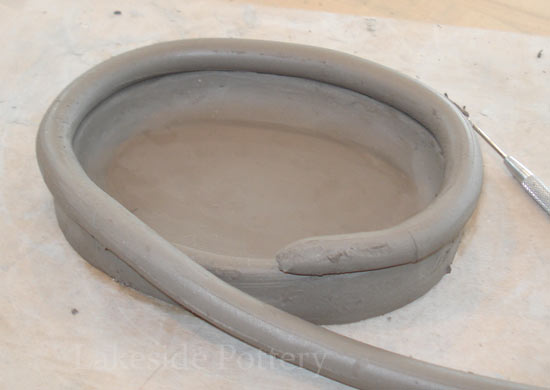
Coiling Basics DEMONSTRATION: -What tools are commonly used. -How to create a coil vase, add texture to clay, and attach basic adornments or decoration. -How to make a slab base -How to dry an area quickly with a hair dryer. -How to roll a coil & adjust for various size work. -How to vary direction in/out with coils. -How to slip and score coils together. -How to slip and score add-ons. -How to store it for work the next day versus preparing it for drying and firing. -Where to put initials or name at. 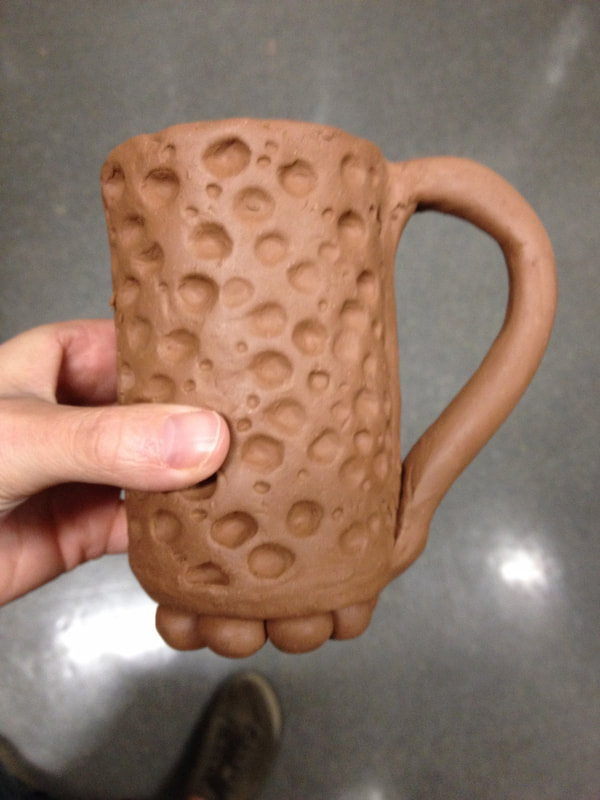
PRACTICE CRAFTSMANSHIP by using a sponge to smooth all rough and sharp spots to make your vessel more functional.
Below: Blending clay coils. 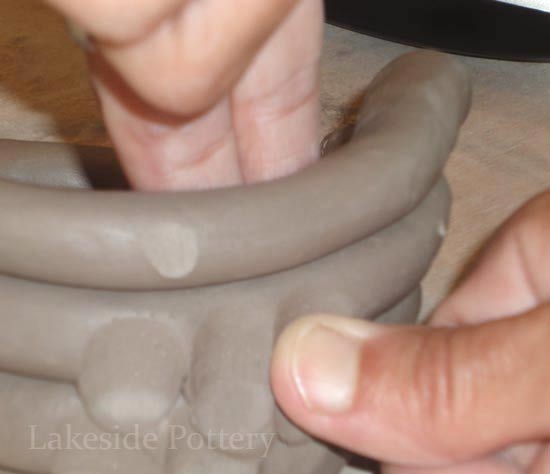

|
Below: STEPS 1-5 for your cup.


|
How to Use Coils Presentation
Clay Activity:
This tutorial will focus on using clay to create basic coil-based clay forms and to then apply texture and objects to the surface using the slip and score method. Students will also learn the slab method to construct a base for a small cup during this activity. DO NOW: Get a piece of clay (about the size of one softball): AND -1 rolling pin (will have to share 1 per table) -1 towel -1 needle tool or fork -1 jar or cup of water -1 clay brush Create a coil cup that will have a utilitarian purpose (to hold something). Shape a handle to fit the theme or style of your work. Important Vocabulary: Utilitarian: having a practical use or function, i.e. drinking out of. Slip & Score: scratching up (score) the surface of clay and then adding clay slip (wet muddy clay) to the scratches to 'glue' two or more pieces together. ------------------------------------------------------------------- MAKE A CUP! Step 1: Gather materials listed above. Step 2: Use a tin can covered in newspaper to shape the coils around to make a cup. Step 3: Roll out coils evenly, about the thickness of your index finger. Step 4: Roll out a flat slab for your cup's base. Make it an extra 1/2 inch wider than the can so you can set coils ON TOP of it. Step 5: Attach your coils, score the top of each one before sticking it to the prior one. Step 6: You MUST ADD TEXTURE and an additional element(s) such as a little house/bird/stick/leaf, etc. Be creative! The surface can be smoothed by hand or the coils can be left showing on the outside. Step 7: Smooth the inside to make it functional, regular coils would make the cup hard to clean well. Step 8: Clean up with a sponge or brush with water. Scratch name or initials on bottom of cup or bottom side of cup. Set out to dry. | ||
Day 3 Activities
|
Basic Clay Skills Activity 2:
What do you do when your work is dried and fired? GLAZE! This video clip will walk you through the basics of how to glaze a piece of pottery. |

|
Glazing Activity:
This tutorial will focus on how to glaze a piece of fired clay. You will be given a piece of fired clay to glaze. The clay you get will be what we call a 'test tile', these tiles will be used to help you see what the different colors and mixtures of glazes might look like if used on a piece of your own. Notes: Our glaze gets brushed on 3 times! 3 coats on the exterior, however, an interior may have more coats. Colors can be mixed on the piece. NEVER contaminate a glaze container with another color! DO NOW: Get a piece of fired clay. Get a glazing brush. Coat it 3 times with glaze. Try a special effect or mix two+. On a piece of paper write down what you mixed and how many layers were used. We will use an underglaze pencil to write this on the test tile. An underglaze pencil is a pencil filled with glaze-like material that will survuve the 2000 degree firing temperature, regular graphite pencil will burn away/disappear during the firing. |
|
Basic Clay Skills Activity 3:
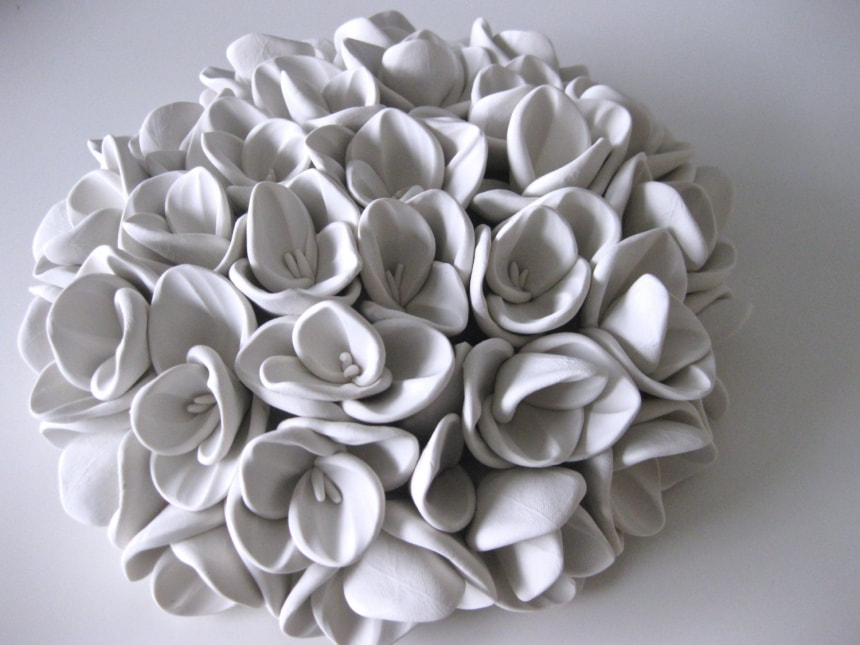
Clay: MUST KNOWS -Clay has a squishy play-doh like feel. -Clay is NEVER thrown away, scraps or re-do's are put into the clay recycle bin and will be reconstituted back to plastic/wet workable clay again. -Clay areas should never be over 1" thick or you may risk cracking or breaking happening in the firing process in the kiln! -Any clay pieces that are not VERY SOFT must be slipped/scored together. This involves scratching up DEEPLY the surfaces of the two pieces of clay being stuck together and putting clay slip in-between them (acts like glue)! -Clay works WILL NOT BE FIRED unless they meet an accomplished level for FORM QUALITY, firing a kiln is very expensive so work should be of the highest quality. -Clay can be sculpted and molded into nearly anything you can imagine. Check out the first video for an example of an artist that used clay as a relief sculpture...could you imagine this as a painting of flowers and birds as well? 
|
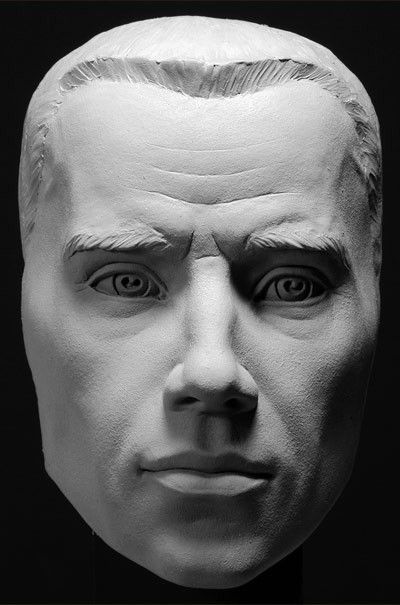
Above: Example Clay Sculpture
Below: Example Clay Roses and Leaves BELOW: example expectations for this mini artwork/project. 
|
Clay Activity:
This tutorial will focus on creating and using small slabs to create a flower and leaves, basic surface texture, and blending shapes. You will learn the slab & pinch methods of shaping clay. DO NOW: Get a piece of clay (a handful size block): AND -1 rolling pin (share 1 per table) -1 towel -1 needle tool -1 jar or cup of water -1 clay brush -1 paper bowl 1. Roll out a clay slab the thickness of the rolling sticks or of your index finger. Be careful to not get the edges or ends flattened out, try to keep the slab even. 2. Cut a clay slab about 6 in x 6 or larger in a square, rectangular, or round shape. Cut the slab evenly using a clay ruler and a table knife or clay fettling knife, you can also use your paper bowl to cut an accurate shape. 3. Drape the clay slab over-top the paper bowl with a piece of plastic wrap in between to create a fun arc to your slab or let it stay flat if you have chosen a square/rectangle shape. Be careful with all clay tools. Create clay leaves, flowers, birds, or other objects of your own interest. The objects should make sense together. Each object should be slipped and scored onto the slab. You can use a needle tool or sharp pencil to score areas for slip or to carve/draw details. 4. FILL UP THE ENTIRE SLAB! Carve your initials in the side of the slab or on the front in a corner. Place in the storage area to dry when completed. |
Day 4 Activities
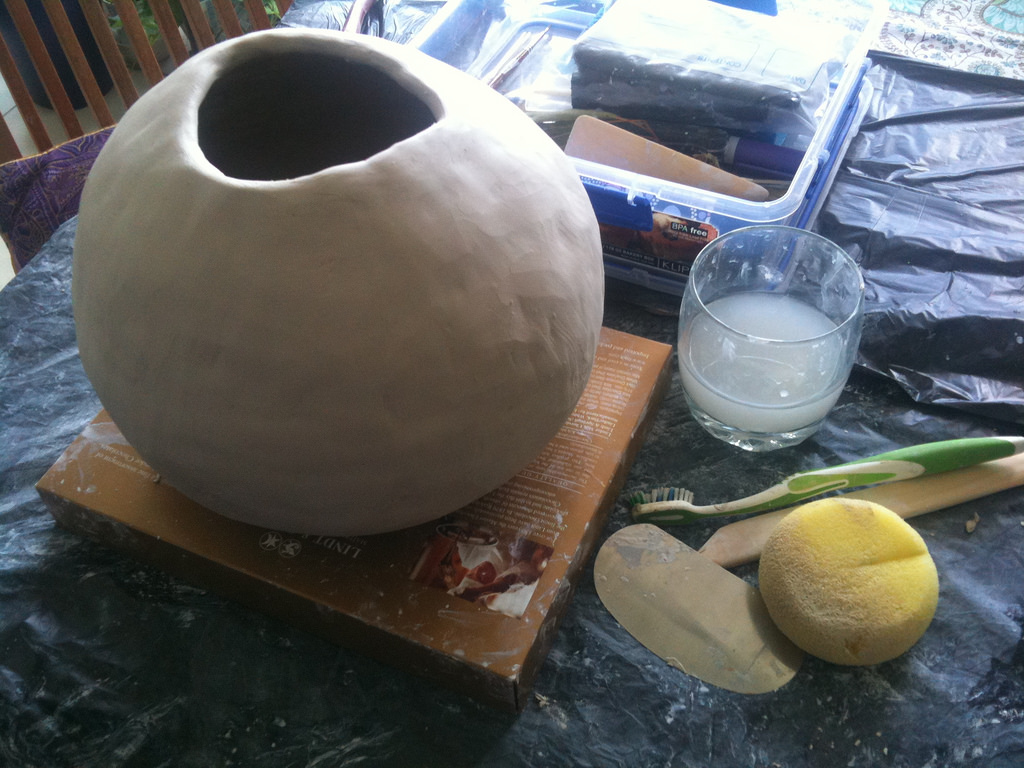
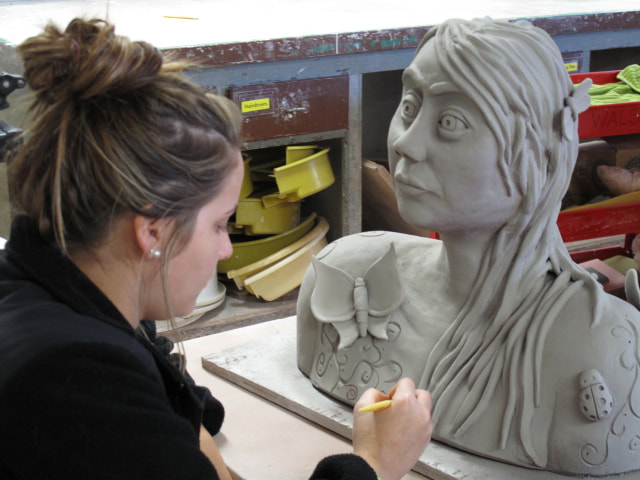
Major Project 1: Sculpting a large scale clay bust!
|
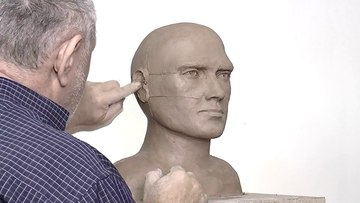
Clay Skills Demonstration 1
How to make a clay mask or bust on a paper form. 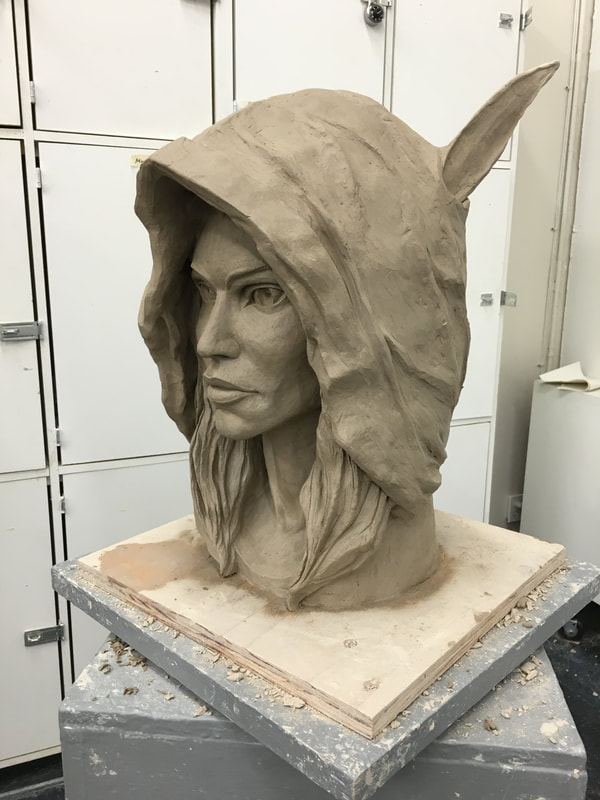
|
|
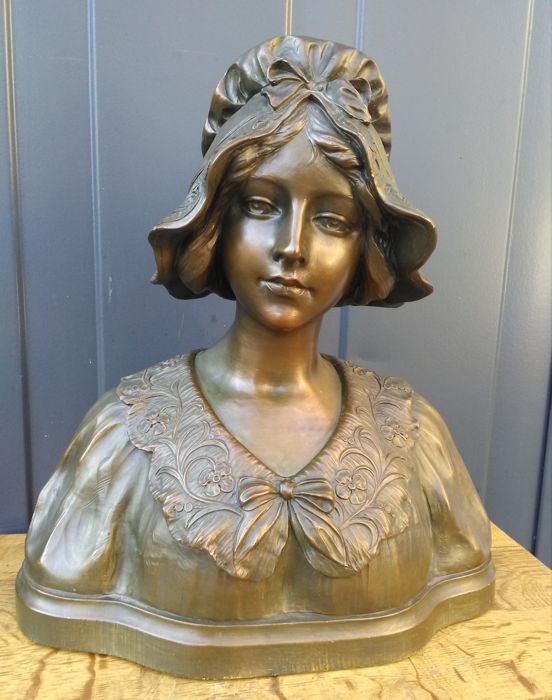
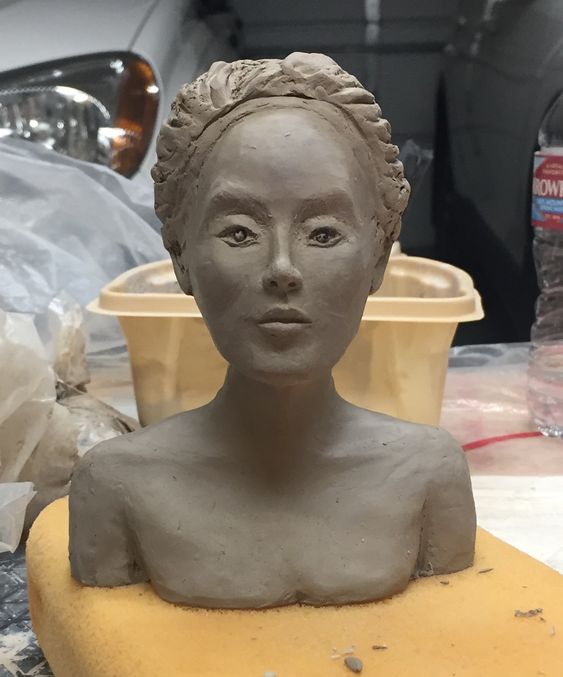
Sculpture Demo Examples:
DO NOW: Pay close attention to the process used to create clay busts, solid sculpting (additive process), paper forms for clay masks (additive process), and how different types of sculptures can be assembled together. Important Vocabulary: Additive Sculpture: you add clay or build it up bit by bit. Subtractive Sculpture: you start with a large solid cube of clay and carve away at it. Note: clay items must fit into the kiln. |
Project 1 Details:
(View or Download Project Summary Above)
|
Where to Get Started...
1. Review the art themes in your learning journal. 2. Complete a theme form in your journal. 2. Sketch out some very basic ideas in your learning journal for 'proj. 1 or 2 or 3'. 3. Begin filling out a portfolio and doing project research. |

|
Check Out The:
Project Expectation Examples |
Understanding Art Worlds: Creativity & Ceramics
Workshop 1: Exploring Creativity
|
What's the Point of Being Creative?
Why is it important to understand the world of art, visual culture, and how can you unleash your creative genius (aka...dreams)? Total Time Allotted: 30 minutes (15 minute video / 10-15 minute discussion) |
|
Discussion & Writing Activity:
DO NOW: In the back of your journal on one of the 'Other Class Assignments' pages write down the date. Write down the name: Patti Dobrowolski and DRAW the box, cloud, and hill on your journal page. 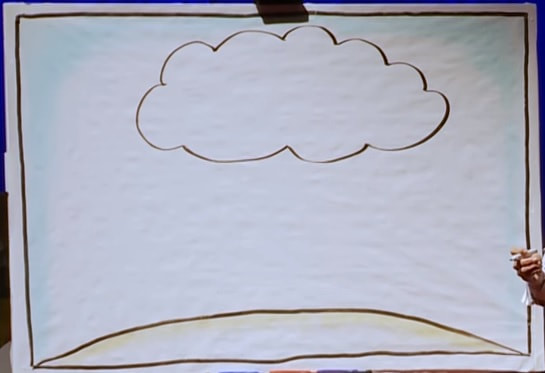
Follow along with the directions of the presenter during the video.
Whole class discussion to follow. |
|
What's the Point of Being Creative?
Why is it important to have some limitations to HELP your creativity grow! Learning about the BOX STRATEGY. Total Time Allotted: 30 minutes (18 minute video / 12 minute discussion) |
|
Discussion & Writing Activity:
DO NOW: In the back of your journal on one of the 'Other Class Assignments' pages write down the date. Write down the title: "Trick your Mind into Being Creative" and write down the following questions: 1. How could making the challenges you are assigned MORE challenging actually help you become more creative? 2. What is the 'box strategy' in your own words? After the video and discussion, answer the questions. |
Workshop 2: American Potters
|
Artists Spotlight: Warren MacKenzie
Ceramics appreciation video about Warren MacKenzie, one of the most famous American potters. Lives in rural Minnesota. Total Time Allotted: 25 minutes (20 minute video / 5 minute discussion) |
|
Discussion & Writing Activity:
DO NOW: In the back of your journal on one of the 'Other Class Assignments' pages write down the date. Write down the name: Warren MacKenzie and WRITE down what you feel is the big take away from learning about the life, artworks, and philosophy of MacKenzie. At least 3 sentences or more. |
|
Artists Spotlight: Mark Hewitt
Ceramics appreciation video about Mark Hewitt, one of the most famous American potters. Lives in North Carolina. Total Time Allotted: 22 minutes (17 minute video / 5 minute discussion) |
|
Discussion & Writing Activity:
DO NOW: In the back of your journal on one of the 'Other Class Assignments' pages write down the date. Write down the name: Mark Hewitt and WRITE down what you feel is the big take away from learning about the life, artworks, and philosophy of Hewitt. At least 3 sentences or more. |
Research Presentation Introduction (presented @ final)
Workshop 3: Eastern and Western Ceramics
|
Artists Spotlight: Jun Kaneko
Ceramics appreciation video about Jun Kaneko, one of the most famous American potters. Creates the largest ceramic artworks in the world. Lives in Omaha, Nebraska. Total Time Allotted: 12 minutes (9 minute video / 3 minute discussion) |
|
Discussion & Writing Activity:
DO NOW: In the back of your journal on one of the 'Other Class Assignments' pages write down the date. Write down the name: Jun Kaneko and WRITE down what you feel is the big take away from learning about the life, artworks, and philosophy of Kaneko. At least 3 sentences or more. |
|
Artists Spotlight: Japanese Pottery
Ceramics appreciation video about Japanese Potters. -Mori Pottery of Shikoku -Kei Fujiwara at Bizen -Mr. Ichino at Tamba -Ancient elbo-made pots near Kyoto -Yuzo Kondo at Kyoto Bidai Total Time Allotted: 20 minutes (15 minute video / 5 minute discussion) |
|
Discussion & Writing Activity:
DO NOW: In the back of your journal on one of the 'Other Class Assignments' pages write down the date. Write down the name: Japanese Pottery Methods and WRITE down what you feel is the big take away from learning about the life, artworks, and philosophy of Japanese potters. At least 3 sentences or more. |
